What this does for you
When you connect a Bitcoin wallet to BitBooks, every transaction in that wallet shows up in your books automatically. No more downloading CSVs from your wallet provider. No more typing in transactions one by one. BitBooks talks to your wallet, sees what came in and what went out, and creates the entries for you.
Today BitBooks supports Blink (the Lightning wallet provider). More providers are being added. When a new one is ready, it shows up in the connection list. If yours isn't there yet, it's coming.
What "Bitcoin Connections" means in BitBooks
You'll see the phrase Bitcoin Connections throughout the Admin section. That's BitBooks' name for the feature that securely links you to a wallet provider. Think of it as the bridge between BitBooks (which keeps your books) and your wallet (which holds your coins).
Behind the scenes there are two important pieces:
- Your wallet provider. Blink, eventually Strike, Coinbase, and others. This is where your Bitcoin actually lives.
- A locked link between them and BitBooks, protected by a password that only you know.
We'll explain both as we go.
Before you start
You'll need:
- An account with the wallet provider you want to connect (e.g., a Blink account)
- The wallet provider's sign-in details ready
- 5 quiet minutes
You'll also be asked to write down a 12-word recovery code. Have something to write on (paper, password manager, sticky note in a safe drawer) before you click around.
The connection process: step by step
Step 1. Open the Bitcoin Connections page
In the left sidebar, click Admin. Then click the Connectors tab at the top of the Admin page.
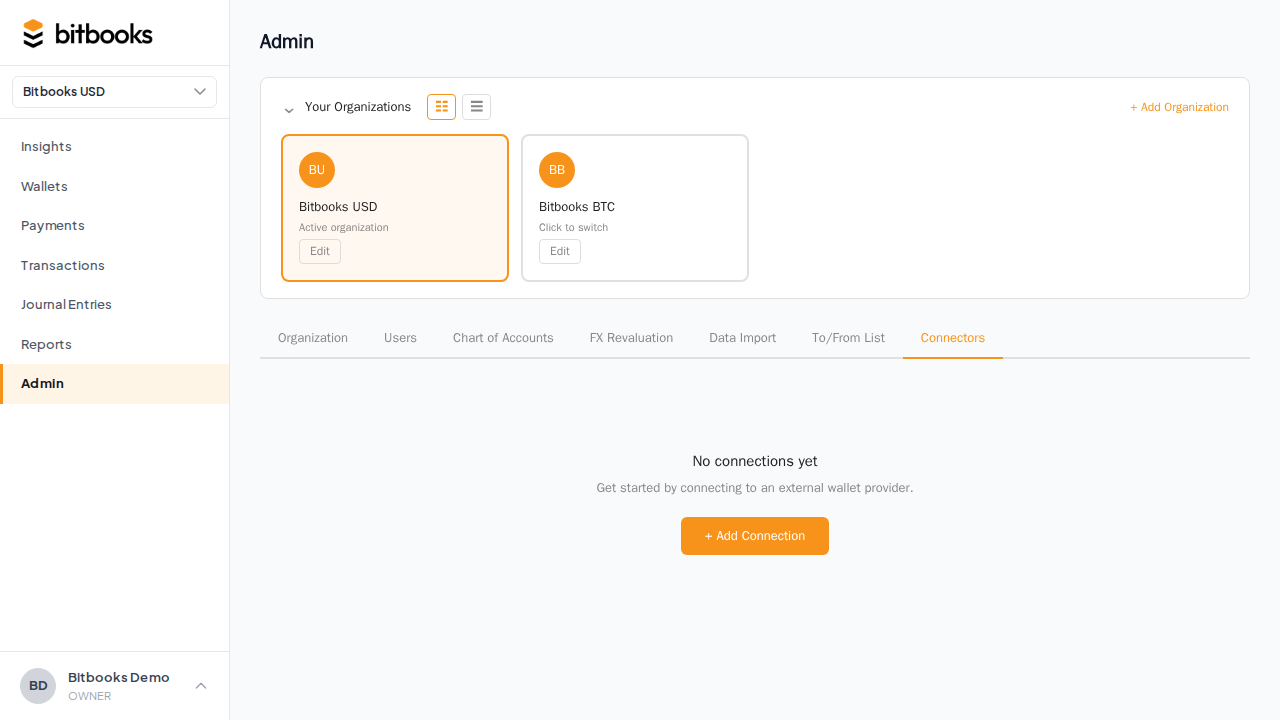
You'll see a list of any wallets you've already connected (probably empty if this is your first time) and a button labeled Add Connection.
Click Add Connection.
Step 2. Pick your wallet provider
A window opens showing all the wallet providers BitBooks supports today. They're grouped into categories:
- Lightning wallets, wallets that send and receive Bitcoin instantly through Lightning (small, fast payments)
- On-chain wallets, wallets that send and receive Bitcoin on the main Bitcoin network (slower, larger amounts)
- Exchanges, services where you buy and sell Bitcoin (Coinbase, Kraken, etc.)
- Other categories as more providers come online
Providers labeled BETA are working but newly added. Providers labeled SOON are visible so you know they're on the way, but they aren't clickable yet.
Find your provider, click it.
Step 3. Set up your vault password (first time only)
The first time you connect any wallet, BitBooks asks you to pick a vault password.
Why a vault password?
When BitBooks talks to your wallet provider, it has to use your wallet's sign-in details. Those sign-in details are sensitive. They're effectively the keys to your wallet. We don't want to keep them sitting around on a server in plain sight, where anyone with access to the server could read them.
So BitBooks locks them inside a digital safe. The combination to that safe is your vault password.
Three things to know:
- The password never leaves your device. When you type it, it's used right there in your browser to unlock the safe. The server never sees it. (This is the same trick a password manager like 1Password uses.)
- We can't recover it for you. If you forget it, no one at BitBooks can reset it. There's no "Forgot password?" link that fixes this. That's the trade-off for the safe being actually safe.
- You'll get a 12-word recovery code in the next step. This is your backup. If you ever forget your vault password, the recovery code is the only way back in.
Pick a strong password. Something at least 12 characters. Don't use the same password you use for your email or your wallet provider. If you have a password manager, generate one there and save it.
Type your password, type it again to confirm, click Save and continue.
Step 4. Save your 12-word recovery code (first time only)
You'll see a screen showing 12 random words on a dark background. Like this:
banana correct horse battery staple sunset cobalt
melody piano carbon thunder olive
(Real codes look like that, twelve common English words.)
This is your recovery code. It's the only backup for your vault password. Save it now. Options:
- Best: Type it into your password manager (1Password, Bitwarden, etc.) as a "secure note"
- Good: Write it on paper and put it where you keep important documents
- OK: Take a photo of it and save it in an encrypted note (Apple Notes locked note, etc.)
- Bad: Email it to yourself, save it in plain text on your desktop, screenshot it to your camera roll
Once you've saved it, check the box that says "I have saved this recovery code somewhere safe" and click I have saved it · Continue.
⚠️ Once you click Continue, we can never show this code to you again unless you re-enter your vault password. If you lose both, the only way to recover access is to start over and reconnect your wallets.
Step 5. Sign in to your wallet provider
A new browser window opens. This is your wallet provider's window, not BitBooks. It might be Blink, Strike, Coinbase, depending on what you picked.
Sign in normally, the way you would on the provider's website. Some providers ask you to grant permission for BitBooks to read your transactions. Say yes.
If you have multiple wallets at this provider (like a Lightning wallet and an on-chain wallet at Blink), you'll usually be able to pick which one(s) to connect. Tick the ones you want.
When you're done, the provider's window closes automatically.
Step 6. Review your wallets
BitBooks now shows you the wallets it found. For each one, you decide:
- Create new wallet. Make a fresh wallet entry in BitBooks. You'll fill in a name (e.g., "Blink Lightning"), a wallet type (Software, Hardware, Exchange, Custodial, or Bank), and an opening balance.
- Attach to existing wallet. Link this connection to a wallet you already created in BitBooks. Maybe you've been tracking it manually and want to switch to auto-sync. The existing wallet's history stays exactly as it was. Future transactions just start flowing in automatically.
For each wallet you create new, you'll fill in:
| Field | What it means | Example |
|---|---|---|
| Name | What you call this wallet in BitBooks | "Blink Lightning Hot" |
| Wallet type | The general kind | Exchange (for Blink) |
| Institution | Who hosts it | Blink |
| Currency | Which currency this wallet holds (read-only) | BTC |
| Issuer | Optional | (leave blank) |
| Opening balance | How much was in it on the start date | 0.05 |
| Start date | The date you want BitBooks to start tracking from | Today, or earlier if you want history |
A note on opening balance. If you've had this wallet for a while and it already holds Bitcoin before you connect it, the opening balance is what's in it on the start date you pick. BitBooks records that as a journal entry on the start date, then syncs every transaction after.
Click Save wallet (or Save 2 wallets if you connected multiple).
Step 7. You're connected
The window closes. You're back on the Admin → Connectors page, and your new wallet shows up in the list with a status of Synced (or Syncing if it's still pulling history).
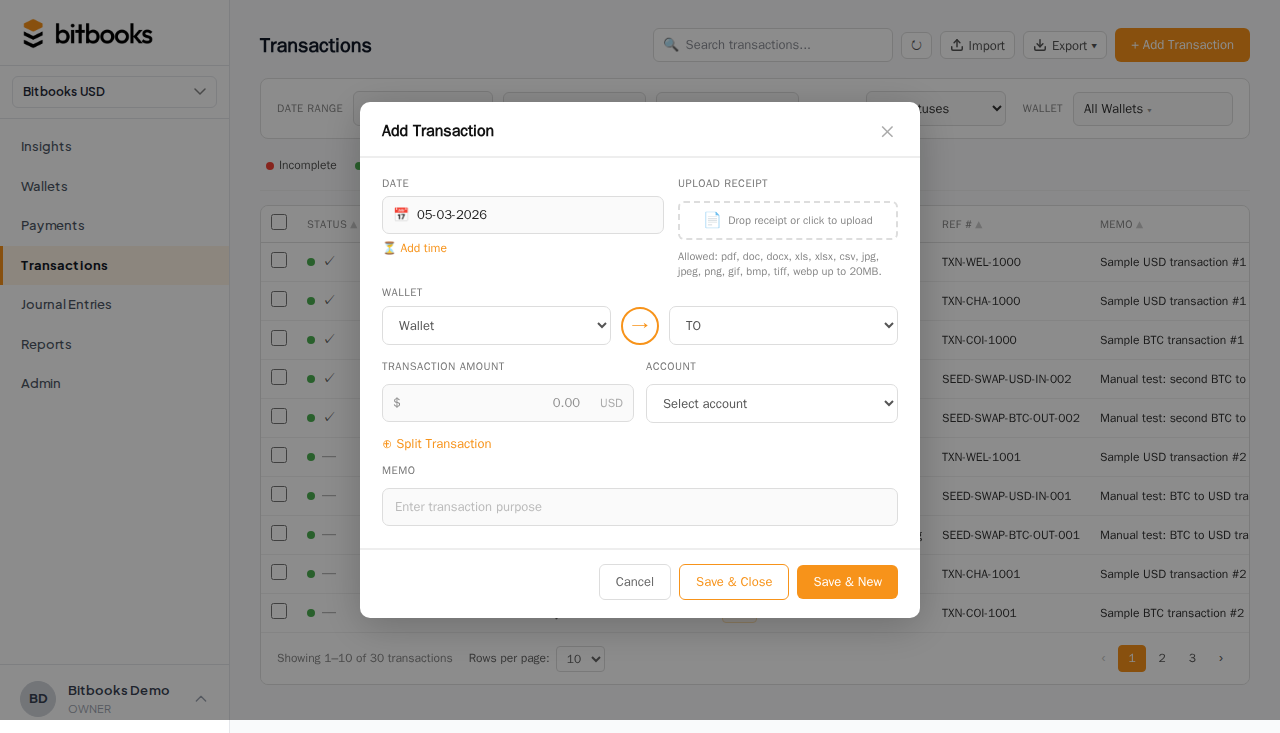
Within a minute or two, you'll see your imported transactions on the Transactions page in the sidebar.
What happens after you connect
- Auto-sync runs in the background every few hours, pulling new transactions as they happen.
- You can manually trigger a sync any time from the wallet's detail page (open Wallets, click the wallet, look for a Sync button).
- Imported transactions land as Drafts. That means they're recorded but not yet finalized. You review them, fix any categorization, then post them. (See Draft vs Posted Journal Entries for how this works.)
- You don't need to type the vault password again to keep syncing. Auto-sync uses keys that are already unlocked. You only re-enter the vault password when you add a new wallet connection.
Adding a second (or third, or tenth) wallet
You can connect as many wallets as you have. Each one is its own connection. Same Admin → Connectors → Add Connection flow.
The difference: you'll only set up the vault password once. Every connection after that, BitBooks just asks you to type your existing vault password to unlock the safe, then opens the provider's sign-in window.
What can go wrong, and how to fix it
"Browser blocked the popup"
Some browsers block popup windows by default. Look for a popup-blocked notification near the address bar. Click it, choose Allow popups for support.bitbooks.com (or whichever domain you're on), then try again.
"The widget did not return any connected wallets"
Usually means you closed the provider's window without finishing the connection, or the provider rejected your sign-in. Click Add Connection again and start fresh.
"I forgot my vault password"
If you have your 12-word recovery code: enter Admin → Connectors and look for the Forgot password? option in the unlock screen. Type the recovery code, then pick a new vault password.
If you have neither the password nor the recovery code: you can reset everything. This wipes out the saved wallet sign-in details (your wallets stay in BitBooks, but they stop syncing). You'll need to reconnect each one. Contact support and we'll walk you through it.
"Sync stopped working"
Open the wallet in Wallets, look at the sync status. If it says Error, the wallet provider probably wants you to sign in again. This can happen if you change your password at the provider, for example. Reconnect the wallet. It'll re-attach to the existing wallet so your history is preserved.
A few things this isn't doing
To keep your peace of mind clear:
- BitBooks does not move your Bitcoin. Reading transactions is a one-way street. Even if a malicious actor got into BitBooks, they couldn't send Bitcoin out of your wallet through this connection.
- BitBooks does not see your seed phrase or your wallet's private keys. It only sees your provider's sign-in details (an API key or username/password, depending on the provider).
- You can disconnect any time. Open the wallet, click Disconnect, and the connection ends. Your historical transactions stay in BitBooks. New ones simply stop importing.
Where to go next
- Want to manually add a wallet that doesn't have a connector yet? See Creating a Wallet by Hand.
- Want to understand what happens to imported transactions? See Draft vs Posted Journal Entries.
- Need help with a specific provider? See the per-provider guides under Wallets → Providers.