Simple Mode vs Advanced Mode
BitBooks gives you two ways to record what happened:
- Simple Mode is the Transactions page. You fill in a form (wallet, amount, what it was for) and BitBooks figures out the accounting bookkeeping behind the scenes. Designed for people who don't want to think about debits and credits. Perfect for daily entry.
- Advanced Mode is the Journal Entries page. You write the debits and credits yourself. Designed for accountants and bookkeepers who want full control.
Both arrive at the same place. They produce the same entries in the books. The form is just different.
This article is about Simple Mode. For Advanced Mode see Creating a Journal Entry (Advanced Mode).
When Simple Mode is the right choice
Use Simple Mode for:
- A customer paid you (cash or Bitcoin)
- You paid a vendor
- You bought something with the company card
- You moved money between two of your own wallets
- Any everyday transaction where one wallet is involved
Skip Simple Mode and use Advanced Mode for:
- Adjustments where neither side is a wallet (e.g., depreciation, accruals)
- Multi-line journal entries that touch 3+ accounts in unusual ways
- Year-end closing entries
Step by step
Step 1. Open the Transactions page
Click Transactions in the left sidebar.
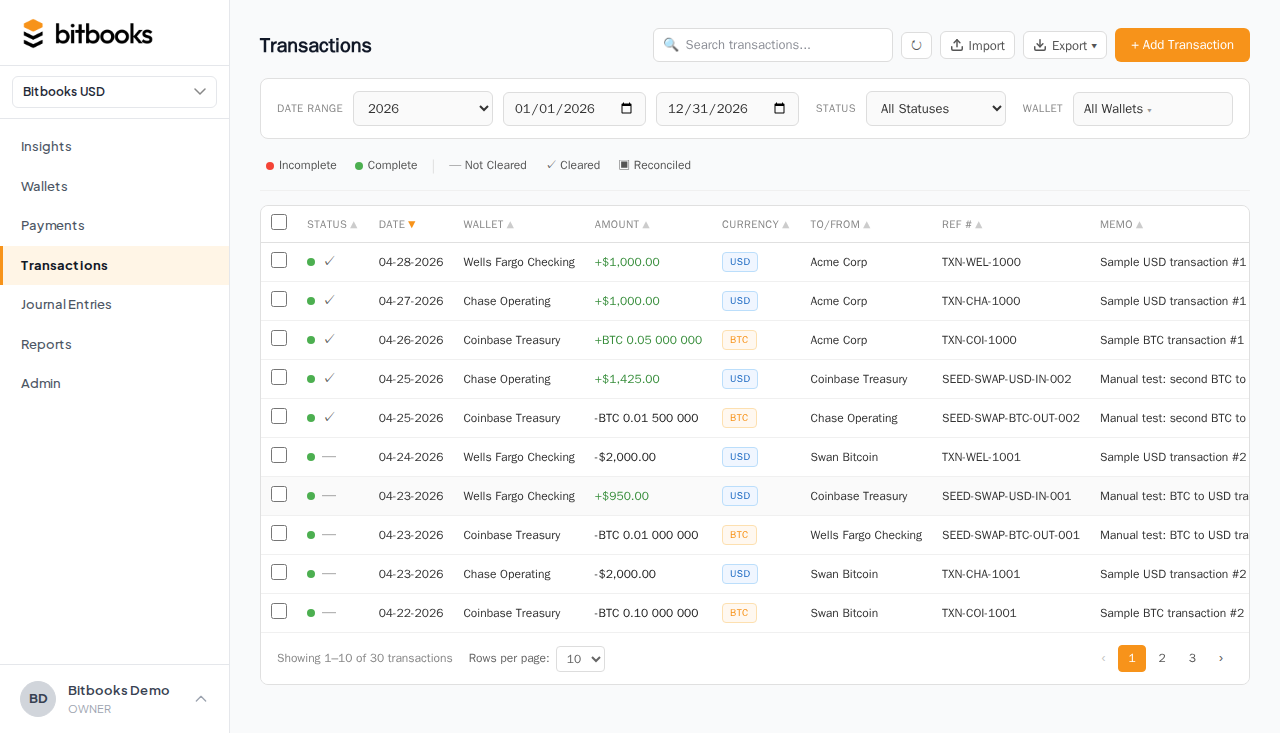
You'll see a list of recent transactions. To create a new one, click New Transaction at the top right.
Step 2. Pick the type of transaction
A modal opens with three options at the top:
- Standard. Money in or money out of one wallet. The most common.
- Split. Money in or out of one wallet, allocated across multiple categories. (E.g., a single $200 charge that's $150 office supplies and $50 marketing.)
- Transfer. Money moving from one of your wallets to another of your wallets.
We'll cover Standard here. Split and Transfer have their own dedicated articles.

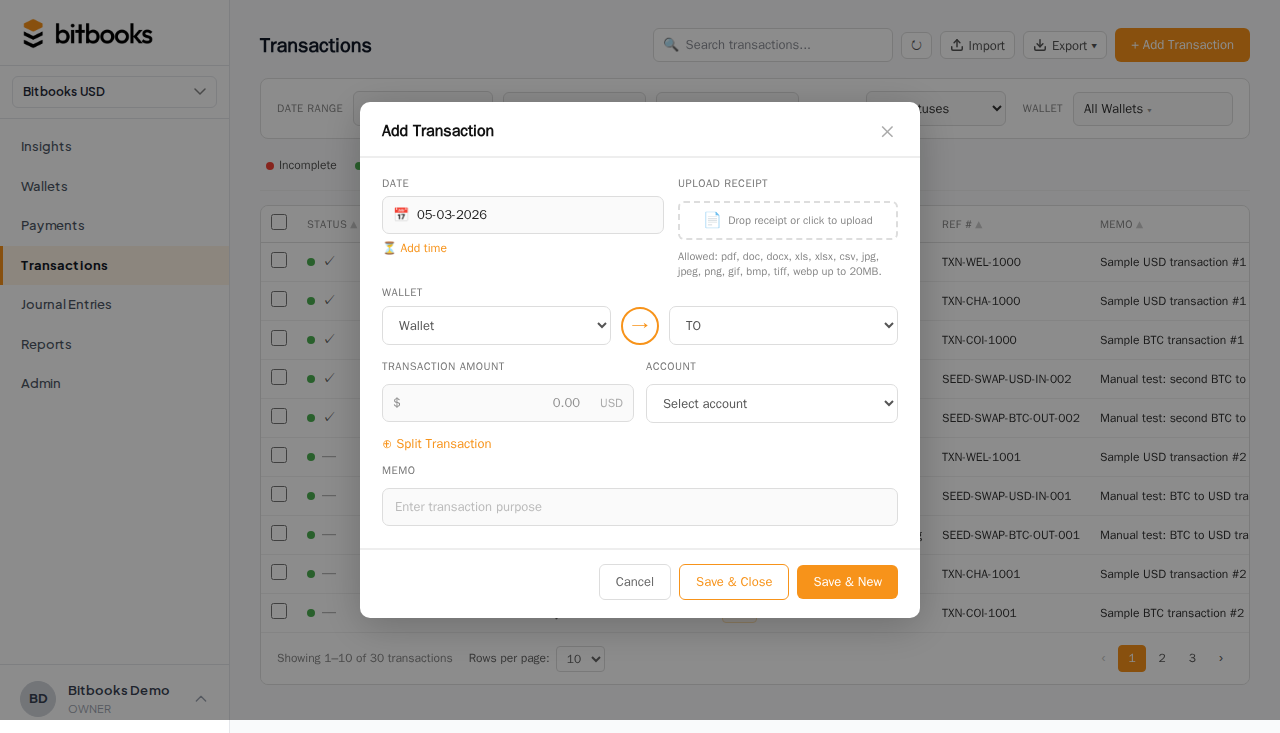
Step 3. Fill in the basics
| Field | What to put |
|---|---|
| Wallet | The wallet the money came in or went out of |
| Direction | "Money in" (you received) or "Money out" (you paid) |
| Amount | How much, in the wallet's native currency |
| Date | When the transaction happened |
| Time (optional) | Useful for Lightning transactions where order of events matters |
The currency is determined automatically by the wallet. If the wallet is BTC, the amount is in BTC (or sats, depending on your display preference).
Step 4. Pick a contact
The contact is the other party in the transaction:
- Money in: who paid you (a customer)
- Money out: who you paid (a vendor)
If the contact already exists in your contacts list, type to search and select. If they're new, click Add new contact to create one on the spot without leaving the form.
For one-off cash sales where you don't track individual customers, you can leave this blank or use a generic contact like "Walk-in Customer."
Step 5. Pick the category (account)
This tells BitBooks what kind of business activity this transaction represents:
- "Sales: Coffee" if a customer paid for coffee
- "Office Supplies" if you bought pens
- "Software Subscriptions" if you paid for Slack
- "Rent" if you paid your landlord
The category determines where this transaction shows up on your P&L. If you put a coffee sale into "Sales: Coffee," it appears under Sales income. If you accidentally put it into "Refunds," it lowers your sales instead.
The dropdown shows all your accounts grouped by type (Income, Expense, etc.). Type to search.
If the right category doesn't exist, you can create a new one from Admin → Chart of Accounts, then come back here.
Step 6. Fill in optional fields
A few fields you can use as helpful but aren't required:
- Memo. Free text. Use it for context: "Invoice #1234," "Tip not included," "Refund of yesterday's order."
- To/From address. A Bitcoin address or wallet identifier if the transaction was on-chain or has a specific destination.
- Reference number. BitBooks auto-generates one (e.g., TX-000142). You can override if you have an external reference.
- Receipts. Drag-and-drop a PDF, JPG, or PNG to attach a receipt. Useful for expense audit later.
Step 7. Save
Three save options at the bottom:
- Save: keeps it as a Draft (you'll review and post later)
- Save and post: saves and immediately makes it Posted (final)
- Save and new: saves and clears the form for the next transaction (great for batch entry)
If you're not 100% sure about the category or the contact, save as Draft. You can always edit and post later. See Draft vs Posted for the full explanation.
A worked example
You're the bookkeeper for a Bitcoin-friendly café. A customer just paid 25,000 sats for a $20 coffee order.
- Open Transactions → New Transaction
- Mode: Standard
- Wallet: Blink Lightning Hot
- Direction: Money in
- Amount: 25,000 (sats)
- Date: today
- Contact: Cash Customer (you don't track individual coffee customers)
- Category: Sales: Coffee
- Memo: "morning rush"
- Save and post
Done. The transaction appears in the table. The 25,000 sats is added to your Blink wallet's balance. Sales income on your P&L goes up by the dollar equivalent ($20).
What "Smart" means in the modal name
The modal is called the "Smart Transaction Modal" because it figures out things for you:
- Currency. It looks at the wallet you picked and uses that wallet's currency.
- Exchange rate. If the transaction is in BTC and your reporting currency is USD, BitBooks fetches the current BTC/USD rate and pins it to this transaction.
- Bookkeeping (debits and credits). You don't see them, but BitBooks creates the right journal entry behind the scenes. Debit one account, credit another, balanced.
- Reference number. Auto-generated.
You can't break the bookkeeping rules from Simple Mode. Every transaction is guaranteed to balance.
Editing or deleting
If the transaction is a Draft:
- Click it in the table to open it
- Edit any field
- Save again, or delete
If the transaction is Posted:
- Editable fields are limited (memo, attachments, contact)
- Amount, date, accounts, currencies are locked
- To change a locked field, reverse the transaction and post a new one. See Reversing a Posted Entry.
Common questions
"I picked the wrong wallet. Can I change it?"
If it's a Draft, yes. Just open it, change the wallet, save.
If it's Posted, no. Reverse the original and post a new one with the right wallet.
"What if the customer paid in cash but I'm tracking it in BitBooks?"
You probably have a wallet called "Cash on Hand." Use that. The mechanics are identical to any other wallet, just no auto-sync (you record cash transactions by hand).
"What does 'Status' mean on the Transactions table?"
Each transaction has two statuses:
- Status (Complete, Incomplete, Pending, Failed, Reversed). The state of the actual transaction.
- Cleared status (Not Cleared, Cleared, Reconciled). Whether the transaction has settled at your wallet provider and been reviewed against the wallet's statement.
For most transactions, Status will be Complete and Cleared status will start as Not Cleared, then move to Cleared after the first reconciliation. See Cleared, Uncleared, and Reconciled Transactions.
Where to go next
- Draft vs Posted for the lifecycle of every entry
- Splitting a Transaction Across Multiple Accounts for split mode
- Recording a Wallet-to-Wallet Transfer for transfer mode
- Creating a Journal Entry (Advanced Mode) when Simple Mode isn't expressive enough
- The 10 Transaction Templates for shortcuts to common transaction shapes